NodePing Authentication with Microsoft Entra OpenID Connect
2024/11/20 Leave a comment
NodePing supports OpenID Connect (OIDC) authentication, allowing you to leverage SSO and multi-factor authentication by using an authentication provider that supports them. We support Google and Microsoft OpenID authentication as well as (on Premiere plan accounts) custom OIDC providers.
In a previous blog post we shared how you can get started with using OIDC with NodePing using Keycloak. In this blog post, I will share with you how you can get Microsoft Entra set up to handle authentication for you with NodePing’s custom OIDC provider feature.
Entra User Configuration
Before configuring Entra to work with NodePing, it is important to make sure your users have the proper configuration. The NodePing contact must include the same email address as your user has in Entra. To ensure your email address in Entra is correct for your user, go to Identity -> Users -> All users. Select the user you want to update, click Edit properties and go to the Contact Information tab.

Ensure that the Email field matches the email that you have set for your NodePing contact. Note that if the email is present only in the “Other emails” section in Entra, logging into NodePing will fail. On the NodePing side, the contact records can have multiple emails, and the address from Entra just needs to be present as one of them.
Entra Admin Center
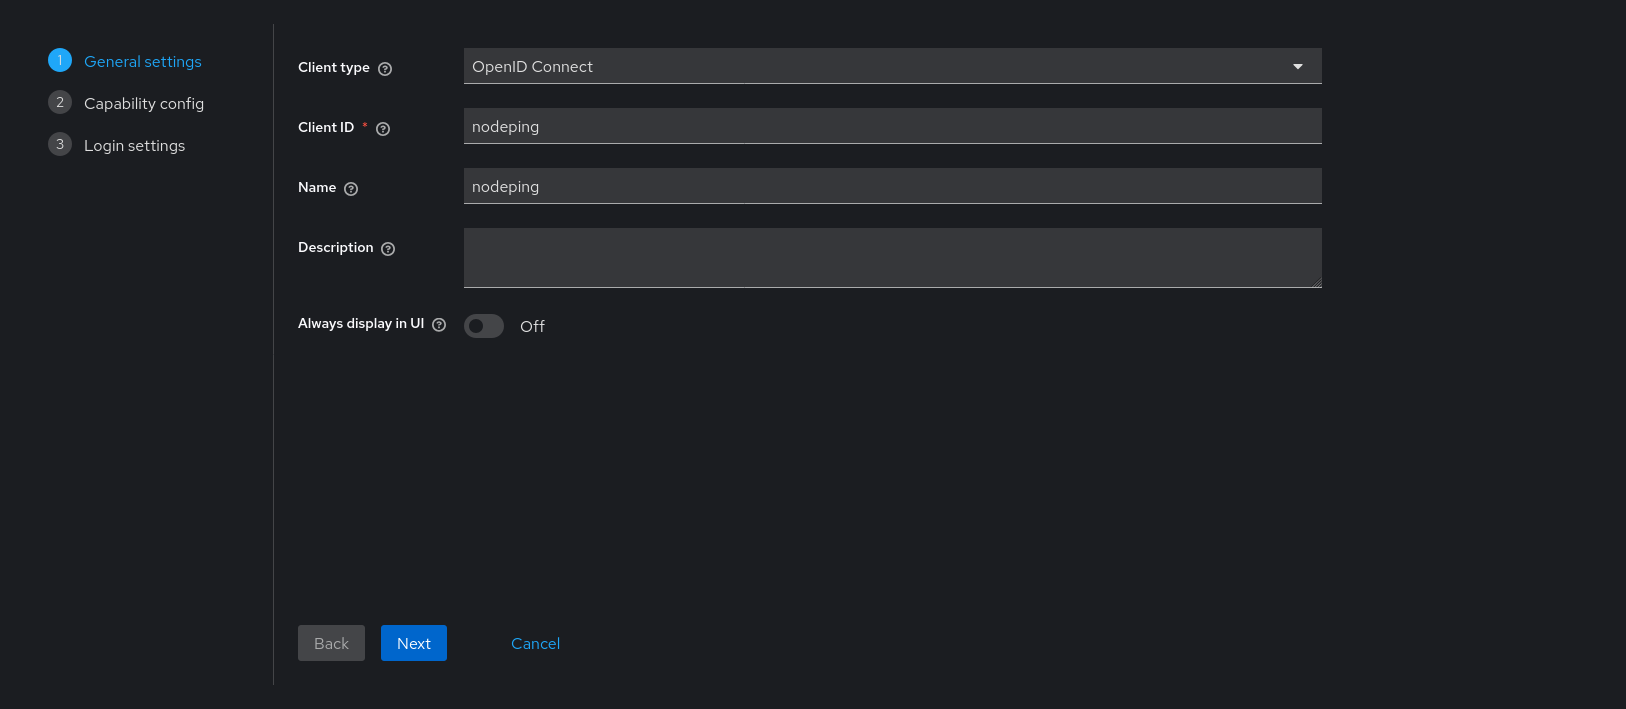
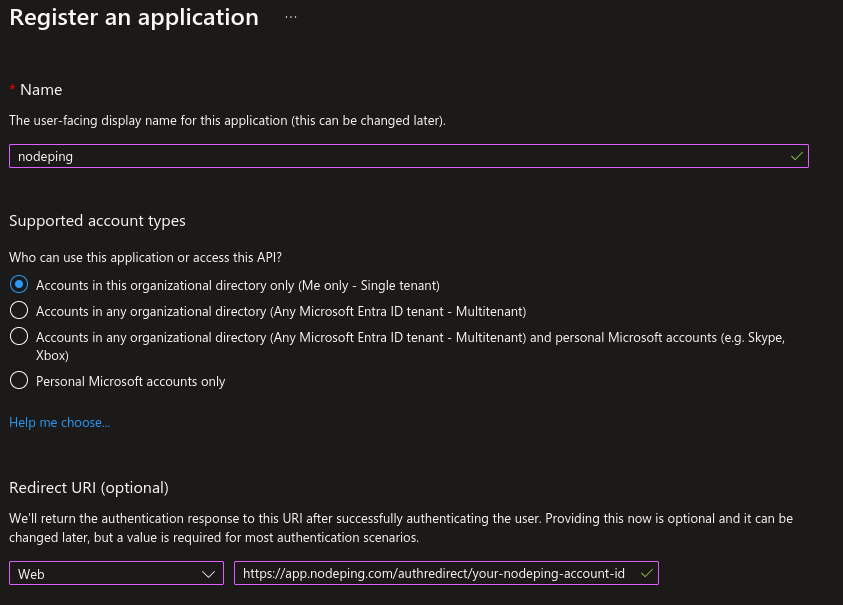
Head to the Entra Admin Center and in the left side panel go to Identity -> Applications -> App registrations. There, select “New registration” to create a new registration. Enter a name, such as “nodeping” and select the supported account types. In this example, I chose “Accounts in this organizational directory only”.
Set the Redirect URI https://app.nodeping.com/authredirect/<your-nodeping-account-id> and select Web from the dropdown menu.
Next click “Register” at the bottom of the page.
Afterwards, go to “API permissions” and go down to the “Other permissions granted for” section. You should see a Microsoft Graph Permissions name labeled “email”. Click the 3 dot menu and choose “Add to configured permissions”.
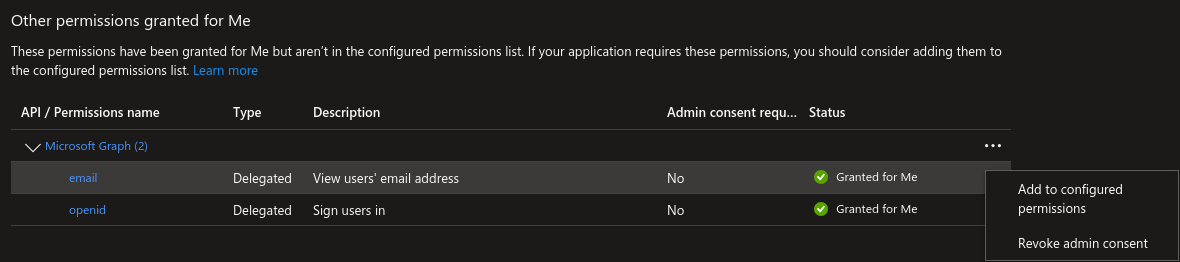
You will be prompted to select “Yes, add”.
If the email permission isn’t in the “Other permission” section, select “Add a permission”, and in the right side panel that pops up select Microsoft Graph, then Delegated Permissions, and check the email checkbox in the OpenId permissions section below, and select “Add permissions”.
Following that, you will need to generate a secret. Go to “Certificates & secrets” and select “New client secret”. Give it a description and expiration according to your organizational needs. You will need the Value for the next step.
NodePing Custom OIDC Configuration
On NodePing, sign in and go to Account Settings -> OpenID Connect.
Here you will need:
- The Discovery URL
- The Client ID
- The Client Secret
The Discovery URL can be found in the Overview section, and selecting Endpoints. You will need the URL labeled “OpenID Connect metadata document”. Paste that into the Discovery URL. For the clientID, you need the Application (client) ID displayed in the overview page of your App registration you made on Entra. Lastly, the clientSecret that was generated earlier in the “Certificates & secrets” page in Entra. Note here that the clientSecret is the “Value,” a long string with special characters. There is also a “Secret ID” listed with the secret, but that is not what you need here.

Once complete, click save.
NodePing User Auth Types
Now, configure your NodePing user to sign in with custom OIDC. In NodePing’s webapp, go to Contacts -> List Contacts. Edit the contact you want to permit OIDC authentication with by selecting “Custom OIDC Authentication” as an allowed auth type and save the contact. This option will only be present for those who have a Premiere account. This NodePing contact will need the same email address that corresponds with the email address of the Entra user.

Logging In
To login to NodePing using Entra, visit https://app.nodeping.com/login/[your NodePing account id] and signed in there. This should direct you to Entra where you can sign in. If everything worked, you should be back at NodePing and signed in. Alternatively, on the login page, change the login method to “Custom OIDC Authentication” in the Login Method dropdown menu and enter your NodePing account ID there.
This blog post isn’t intended to address other policies or settings you may have to set up with Entra, or how to make policies for your users. This basic example configuration is a starting point toward integrating Entra with NodePing. Ensure that your configuration of users and other policies are in alignment with your organization’s requirements and adjust as necessary. For additional information, Microsoft provides some resources here and here to guide you through configuring OpenID Connect authentication with Entra.
If you don’t have a NodePing account yet, give it a try! We offer a free, no-obligation 15-day trial. The best way to see if NodePing meets your needs is to try it out.